Pet Safety Gate Guide: Secure Your Home in Easy Steps
By Nia Okoye • 30th Oct
Did you know that over 60 percent of pet owners face safety challenges at home? Keeping pets safe indoors is often harder than it looks, especially with active dogs or curious cats. Choosing and installing the right pet gate brings real peace of mind, but only if you match it to your home and your pet’s habits. This guide breaks down simple steps that help you select, prepare, and install a dependable pet safety gate with confidence.
Quick Summary
| Key Point | Explanation |
|---|---|
| 1. Assess your home's layout and needs. | Identify risk zones and measure doorways for accurate gate selection. |
| 2. Choose the right gate type. | Match the gate type to its location for optimal security and convenience. |
| 3. Prepare installation areas thoroughly. | Clean installation surfaces and measure widths accurately to ensure a secure fit. |
| 4. Follow installation instructions carefully. | Review and adhere to manufacturer guidelines for a proper and safe setup. |
| 5. Test and confirm gate security regularly. | Perform routine checks to ensure the gate maintains structural integrity and security. |
Step 1: Assess Your Home's Pet Gate Needs
Setting up the right pet safety gate starts with a thorough understanding of your home's unique layout and your furry friend's specific needs. This crucial first step will help you select a gate that keeps everyone safe without cramping your home's style.
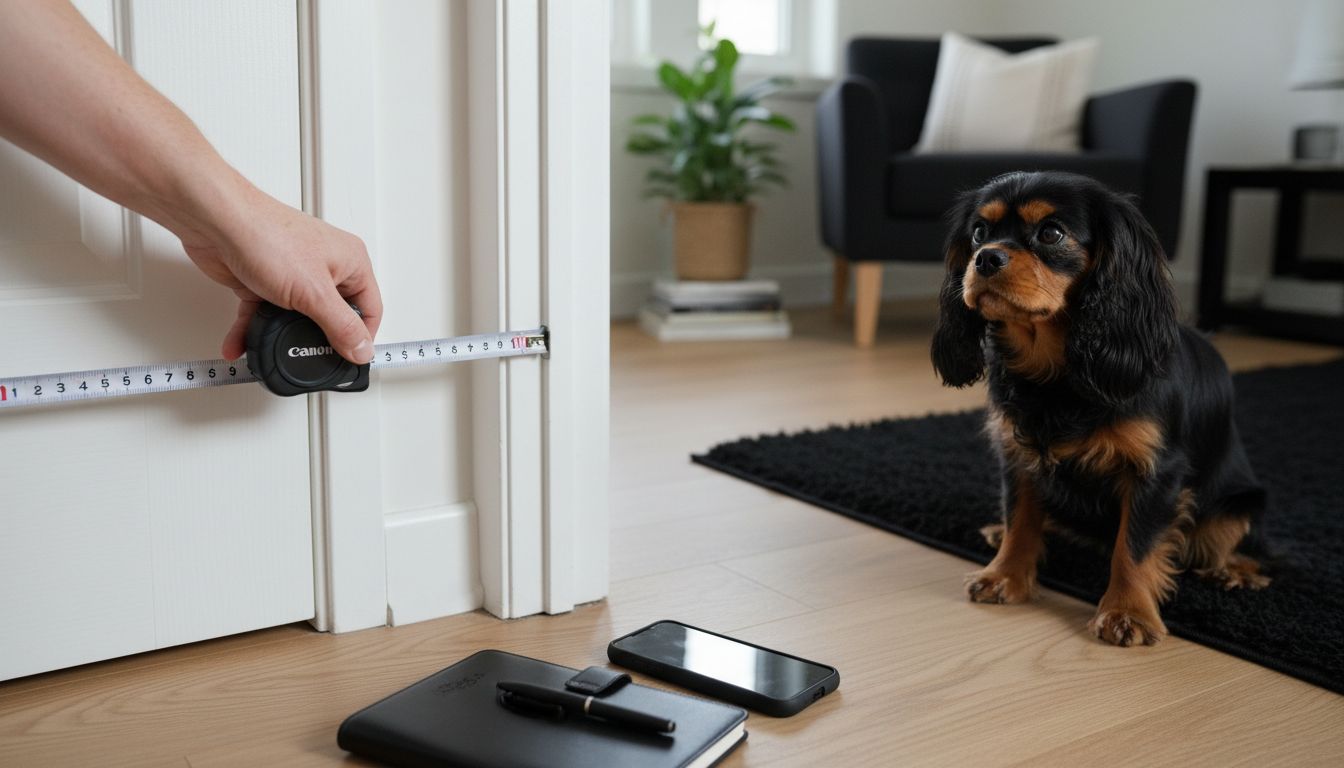
Begin by walking through your living spaces and identifying potential risk zones where your pet might wander into dangerous areas. Look for locations like staircases, kitchen entrances, home office spaces, or rooms with fragile items. Take precise measurements of doorways, hallways, and openings you want to block. Width matters enormously when selecting a gate.
Consider your pet's characteristics during this assessment. A small dog might require a different gate solution compared to a large, energetic breed. Puppies and younger dogs might be more prone to jumping or squeezing through tight spaces. Measure your pet's height and consider their ability to potentially jump or push through standard gate designs.
Pro Tip: Use a measuring tape and record exact width measurements. Round down slightly when selecting gate sizes to ensure a proper fit.
Also evaluate your home's architecture. Some gates work better with pressure mounting, while others require permanent installation. Homes with delicate woodwork or unique wall materials might need specialized mounting solutions. Take note of baseboards, door frames, and wall materials to anticipate potential installation challenges.
By carefully assessing your home's layout and your pet's behavior, you are setting the foundation for effective pet gate selection. The next step will involve matching these insights with the right gate types and features that provide maximum safety and convenience.
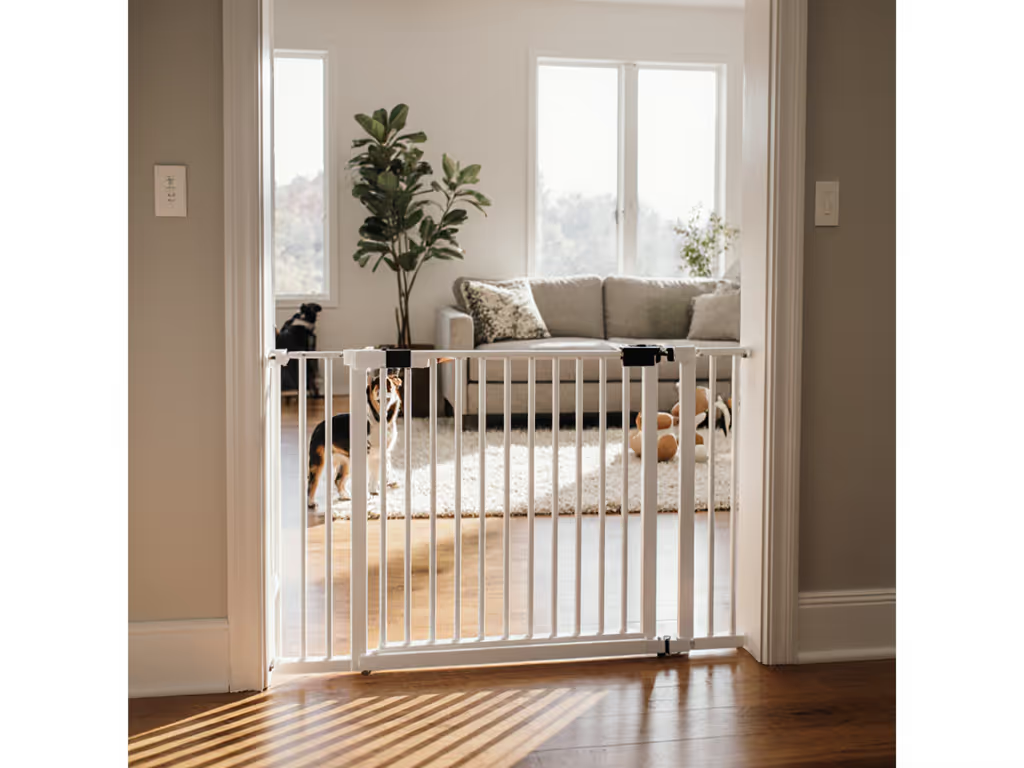
Step 2: Select the Optimal Pet Safety Gate
Now that you have assessed your home's layout, it is time to choose the perfect pet safety gate that balances security, functionality, and convenience. Your goal is to find a gate that not only prevents your pet from accessing restricted areas but also integrates seamlessly with your home's design and your specific needs.
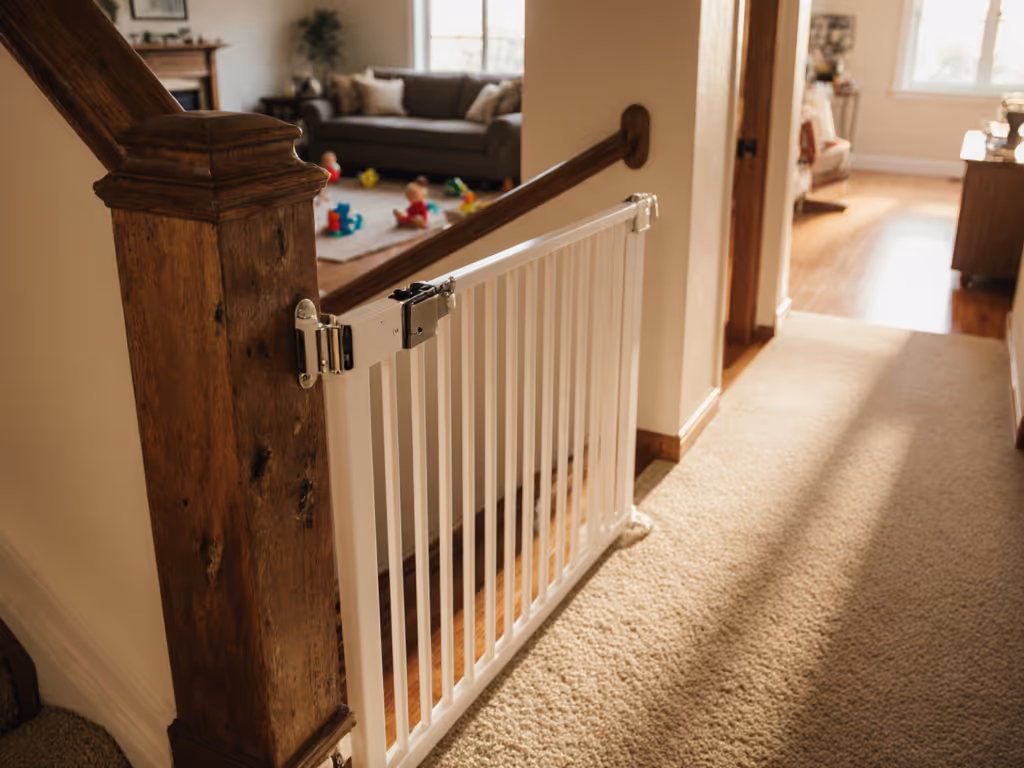
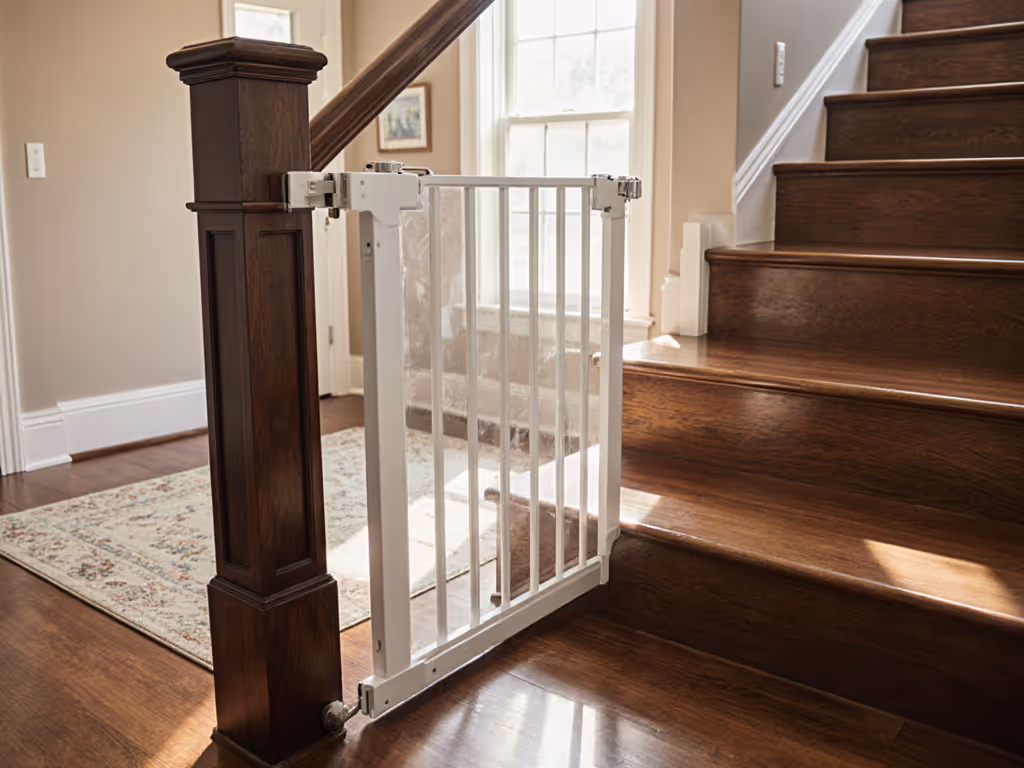
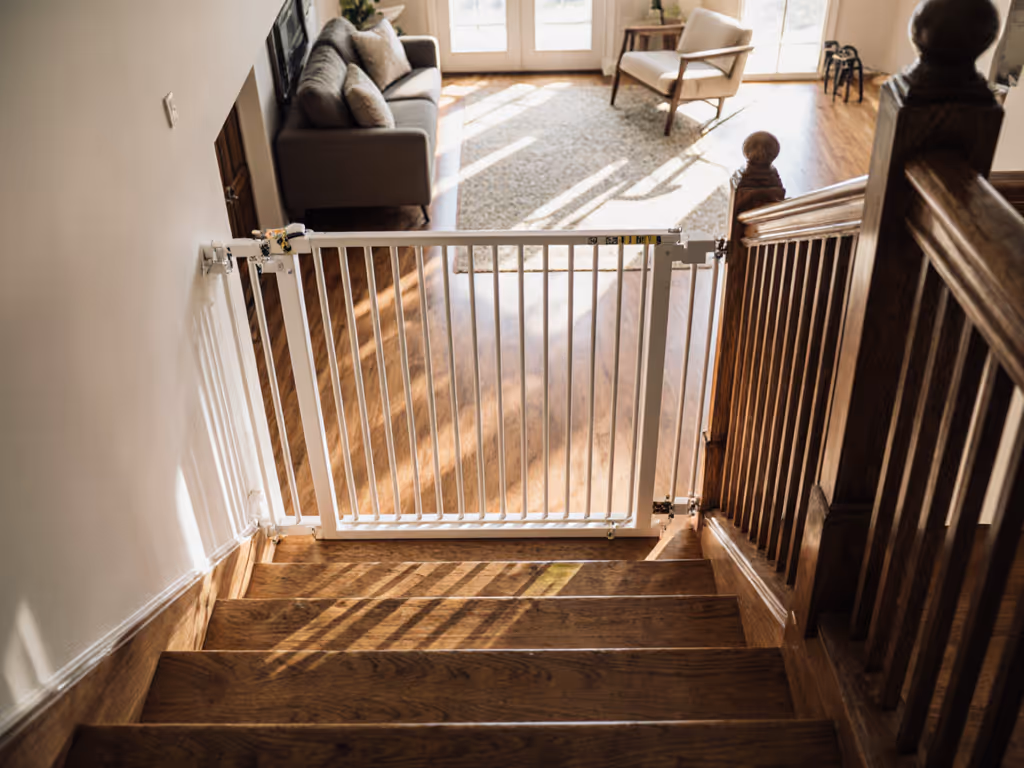
Start by matching the gate type to your specific location. Pressure mounted gates work wonderfully for doorways and hallways with standard wall structures. These gates apply tension between two walls and do not require drilling, making them ideal for renters or those who want a non permanent solution. For staircases or areas with uneven surfaces, hardware mounted gates offer superior stability and safety.
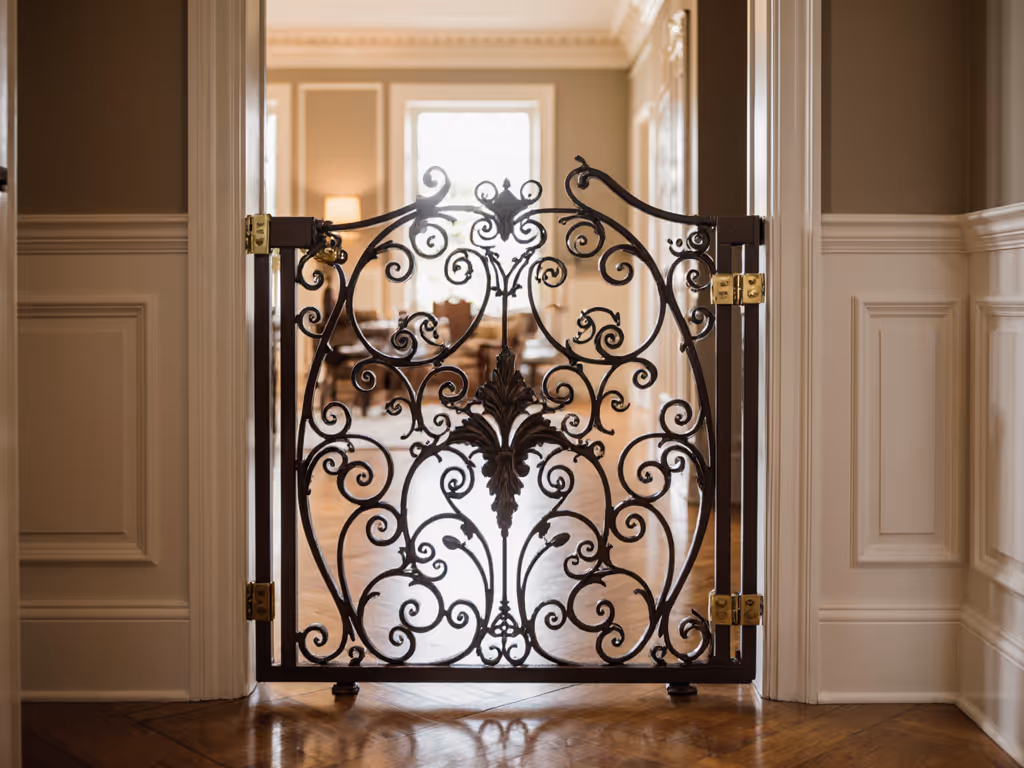
Consider the gate's material and durability. Wooden gates provide an elegant look that complements home decor, while metal gates offer maximum durability and strength. Mesh gates are lightweight and provide visibility, perfect for pet owners who want to keep an eye on their furry friends while maintaining a barrier.
Pro Tip: Look for gates with dual mode functionality that allow both pressure mounting and hardware installation. This versatility ensures you can use the same gate in multiple locations throughout your home.
Pay close attention to the gate's mechanism. Some gates feature walk through designs with one hand release, while others require lifting or sliding. Consider your personal convenience and how frequently you will be moving through the gate. Additional features like auto close mechanisms or additional security locks can provide extra peace of mind.
Here's a summary of common pet gate types for various home needs:
| Gate Type | Best For | Installation Method | Key Benefits |
|---|---|---|---|
| Pressure Mounted | Doorways<br>Hallways | No drilling<br>Temporary | Easy to move<br>No wall damage |
| Hardware Mounted | Staircases<br>Uneven surfaces | Permanent<br>Drilling required | Maximum security<br>Sturdy |
| Wooden | Living rooms<br>Classic decor | Pressure or hardware | Stylish<br>Blend with home |
| Metal | High-energy pets<br>Long-term use | Pressure or hardware | Strong<br>Durable |
| Mesh | Quick setup<br>Small pets | Pressure mounted | Lightweight<br>Good visibility |
By carefully evaluating these factors, you will select a pet safety gate that meets your specific requirements. The next step involves understanding proper installation techniques to ensure maximum effectiveness and safety.
Step 3: Prepare Installation Sites for Gates
With your perfect pet gate selected, the next critical step is preparing your installation sites for a secure and reliable setup. Proper site preparation ensures your gate will function safely and remain firmly in place, protecting both your pet and your home surfaces.
Begin by thoroughly cleaning the installation area. Dust, dirt, and debris can compromise the gate's mounting mechanism, especially for pressure mounted gates. Use a clean cloth to wipe down walls, baseboards, and door frames. Remove any loose paint or uneven surfaces that might prevent a tight seal. For wooden surfaces, check for smoothness and structural integrity before mounting.
Carefully measure the width of your installation area using a reliable tape measure. Measure at multiple points to account for any slight variations in wall width. Most gates come with specific width ranges, so accurate measurements are crucial. Take special note of baseboards or moldings that might affect the gate's fit. Some gates require additional mounting brackets or adaptors for uneven surfaces.
Pro Tip: Always measure twice and confirm gate compatibility before drilling or installing mounting hardware. A few extra minutes of preparation can save hours of frustration.
Evaluate the wall material and choose your mounting approach accordingly. Drywall requires careful anchoring, while solid wood surfaces offer more direct mounting options. For pressure mounted gates, ensure the surface is clean, dry, and structurally sound. Hardware mounted gates will need precise drilling and potentially wall anchors depending on your specific wall composition.
By meticulously preparing your installation sites, you are setting the stage for a secure and reliable pet safety gate.
The next step will walk you through the actual installation process, transforming your careful preparation into a functional barrier that keeps your pet safe.
Step 4: Install and Adjust the Safety Gate
With your preparation complete, it is time to transform your carefully selected pet gate into a functional safety barrier. Installing a pet gate requires patience, precision, and attention to detail to ensure maximum security for your furry friend.
Start by unpacking the gate and laying out all components. Review the manufacturer instructions carefully, as each gate model has unique installation requirements. For pressure mounted gates, begin by positioning the gate frame against the wall. Apply steady, even pressure to engage the mounting brackets. Check that the gate is level using a small carpenter's level to prevent potential gaps or uneven installation.
If you are installing a hardware mounted gate, carefully mark your drilling points using a pencil. Use a drill bit slightly smaller than your mounting screws to create pilot holes. This prevents wall damage and ensures a more secure attachment. Insert wall anchors if your surface requires additional support. Slowly and carefully drive screws into the mounting points, ensuring they are straight and fully seated.
Pro Tip: Always test the gate's tension and stability before considering the installation complete. Gently push and pull to confirm there are no wiggle points or loose connections.
Once mounted, perform a comprehensive function test. Open and close the gate multiple times to verify smooth operation. Check that the locking mechanism engages properly and that there are no unexpected gaps where a pet might squeeze through. Make minor adjustments to tension or mounting points as needed to achieve a perfect, secure fit.
By carefully following these installation steps, you have created a reliable safety barrier that protects your pet while maintaining your home's aesthetics. The next phase involves teaching your pet to respect the new boundary and understanding how to use the gate effectively.
Step 5: Test and Confirm Gate Security
Now that your pet gate is installed, the crucial final step is thoroughly testing its security and functionality. This comprehensive evaluation will ensure your furry friend remains safely contained while giving you peace of mind about your home protection strategy.
Begin with a systematic pressure test. Apply controlled force from multiple angles to simulate your pet's potential attempts to push or squeeze through. For pressure mounted gates, check for any wobbling or potential movement. Gently push against the gate at different points to confirm the mounting tension remains consistent and secure. Hardware mounted gates should feel completely rigid with zero give when tested.
Examine the gate's locking mechanism meticulously. Open and close the gate repeatedly to verify smooth operation. Test the lock by attempting to trigger it accidentally simulating how your pet might interact with the mechanism. Ensure the gate closes fully and locks without requiring excessive force or complex manipulation.
Pro Tip: Simulate your most energetic pet scenario. If you have a jumping or particularly determined animal, test the gate's upper limits by applying more aggressive pressure and watching for potential weak points.
Plan to conduct regular maintenance checks. Inspect mounting points, tension mechanisms, and structural integrity weekly. Look for signs of wear such as loose screws, fabric fraying, or metal fatigue. Small adjustments early can prevent potential security breaches and maintain the gate's long term effectiveness.
By implementing these thorough testing protocols, you transform your pet gate from a simple barrier into a reliable safety system. Your careful approach ensures protection for your beloved pet and preserves your home environment.
Secure Your Home with the Perfect Pet Safety Gate Today
Keeping your pet safe while protecting your home requires the right gate that fits your unique space and lifestyle. This guide highlights common challenges such as choosing between pressure mounted or hardware gates and ensuring the gate fits doorways or staircases perfectly. If you want to avoid the frustration of improper installation and insecure barriers, you need solutions tailored to your specific needs.
At BabySafetyGates.World, we understand how important it is to have a reliable gate that balances safety, convenience, and style. Explore our detailed how-to guides and expert tips on selecting durable materials and easy installation methods. Don't risk your pet’s safety or your home's integrity by settling for less than the best. Act now and discover a range of options designed to keep your furry friend secure and your mind at ease. Visit BabySafetyGates.World to find the ideal gate solution you can trust.
Frequently Asked Questions
How do I assess my home's pet gate needs?
Start by evaluating your home's layout and identifying risk zones where your pet could access dangerous areas. Measure doorways and hallways, and consider your pet's size and behavior to determine the best gate type.
What types of pet safety gates should I consider for different locations?
Choose pressure mounted gates for doorways and hallways, and hardware mounted gates for staircases. Assess your space and pick a gate that provides the appropriate safety and stability for each specific area.
How can I prepare installation sites for pet gates?
Begin by cleaning the area where the gate will be installed to ensure a secure mount. Measure the width multiple times and check wall materials, ensuring they are suitable for either pressure or hardware-mounted gates.
What steps do I follow to install a pet safety gate?
Carefully unpack the gate and follow the manufacturer’s instructions for installation. Ensure the gate is level and securely mounted, testing its tension and stability before finalizing the installation to make sure it can withstand your pet's activity.
How do I test the security of my installed pet gate?
Conduct a pressure test by applying force to the gate from various angles to ensure it remains firm. Also, verify that the locking mechanism operates smoothly and securely, mimicking conditions your pet may create during use.
How often should I check my pet safety gate for maintenance?
Plan to inspect your pet gate weekly for loose screws, structural integrity, or signs of wear. These regular checks help to maintain the gate's effectiveness and ensure your pet remains safely contained.
Related Articles